Quick answer
To rotate an image, turn it in 90° steps until it’s upright, flip it if it’s mirrored, and save a new file. Photos often appear sideways because the camera stored an EXIF orientation tag that some apps ignore. Saving the rotation into the pixels, with no tag, makes the image display upright everywhere.
A photo that looks fine on your phone and arrives sideways in an email, a website, or a print shop is one of the most common image problems there is. The cause is almost never the photo itself. It’s a small instruction stored alongside the pixels that one app follows and another ignores. Once you know how that instruction works, rotating and flipping images becomes predictable.
Rotate vs flip: what each one does
Rotating turns the whole image around its center, like turning a printed photo on a table. A 90° rotation swaps width and height, so a 4000 × 3000 landscape becomes a 3000 × 4000 portrait. Nothing is reversed: text still reads left to right, just at a different angle.
Flipping mirrors the image across an axis. A horizontal flip swaps left and right, as if you were looking at the photo in a mirror; text becomes backwards. A vertical flip swaps top and bottom. Flipping never changes the image’s dimensions.
- Rotate left (90° counterclockwise): the top edge moves to the left side.
- Rotate right (90° clockwise): the top edge moves to the right side.
- Rotate 180°: two 90° steps; the image is upside down but not mirrored.
- Flip horizontal: a mirror image. Left becomes right.
- Flip vertical: a top-to-bottom mirror. Doing both flips together gives the same result as a 180° rotation.
Why is my photo sideways?
A camera sensor is a fixed rectangle. Whether you hold a phone upright or sideways, the sensor reads its pixels in the same order. Rather than rearranging millions of pixels every time you turn the device, most cameras save the pixels as the sensor read them and write a note in the file’s metadata: “to show this correctly, rotate it 90° clockwise.” That note is the EXIF orientation tag.
Software that reads the tag shows the photo upright. Software that ignores it shows the raw pixels, which for a photo taken in portrait often means lying on its side. That’s why the same file can look correct on your phone and sideways somewhere else. Common situations where the tag gets lost or ignored:
- Older software and some image libraries that display pixel data without checking metadata.
- Upload pipelines that strip metadata for privacy or file size but don’t apply the rotation first. The tag disappears and the sideways pixels remain.
- Tools that rotate the pixels but keep the tag. The next app applies the tag again, so the photo ends up rotated twice.
- Pages that set CSS
image-orientation: none, which tells the browser to ignore the tag on purpose.
EXIF orientation values 1 to 8, explained
The EXIF orientation tag holds a number from 1 to 8. Each value describes how the stored pixels relate to the intended view, and therefore which rotation or mirror a viewer must apply to show the image upright. Values 1, 3, 6, and 8 are pure rotations and are the ones cameras commonly write. Values 2, 4, 5, and 7 include a mirror and are uncommon in straight-from-camera photos.
| Value | Stored pixels compared with the intended view | Transform to display upright |
|---|---|---|
| 1 | Already upright | None |
| 2 | Mirrored left to right | Flip horizontally |
| 3 | Upside down | Rotate 180° |
| 4 | Mirrored top to bottom | Flip vertically |
| 5 | Mirrored and turned on its side | Flip horizontally, then rotate 90° counterclockwise (a transpose) |
| 6 | Turned on its side (top edge at the left) | Rotate 90° clockwise |
| 7 | Mirrored and turned on its side | Flip horizontally, then rotate 90° clockwise (a transverse) |
| 8 | Turned on its side (top edge at the right) | Rotate 90° counterclockwise (270° clockwise) |
Value 6 is the one you’ll meet most with phone photos taken in portrait: the pixels are stored in the sensor’s landscape layout, and the viewer must turn them 90° clockwise. Value 8 is the same situation with the phone turned the other way. Value 3 usually means the device was held upside down.
How browsers handle orientation: CSS image-orientation
Current browsers apply the EXIF orientation tag by default when they display a JPEG in an <img> element. This behavior is controlled by the CSS `image-orientation` property, whose default value is from-image. Setting it to none makes the browser ignore the tag and show the raw pixel layout.
That default helps on the web, but it can hide problems. A photo that looks right in your browser may still carry a rotation tag that a desktop app, an e-commerce platform, or a printing service handles differently. For files you hand to other systems, the reliable fix is to store the pixels upright and drop the tag, so there’s nothing left to interpret.
How to rotate an image with Image Edtr
The rotate and flip tool works on JPEG, PNG, WebP, GIF (first frame), BMP, and AVIF where your browser can decode it. When it opens your photo, the browser has already applied any EXIF orientation, so you start from the image as it normally appears. Rotate and flip until it looks right, and the saved file is upright without an orientation tag.
Choose an image
Drop the photo onto the tool or pick it from your device. Files up to 50 MB and 40 megapixels are supported.
Rotate in 90° steps
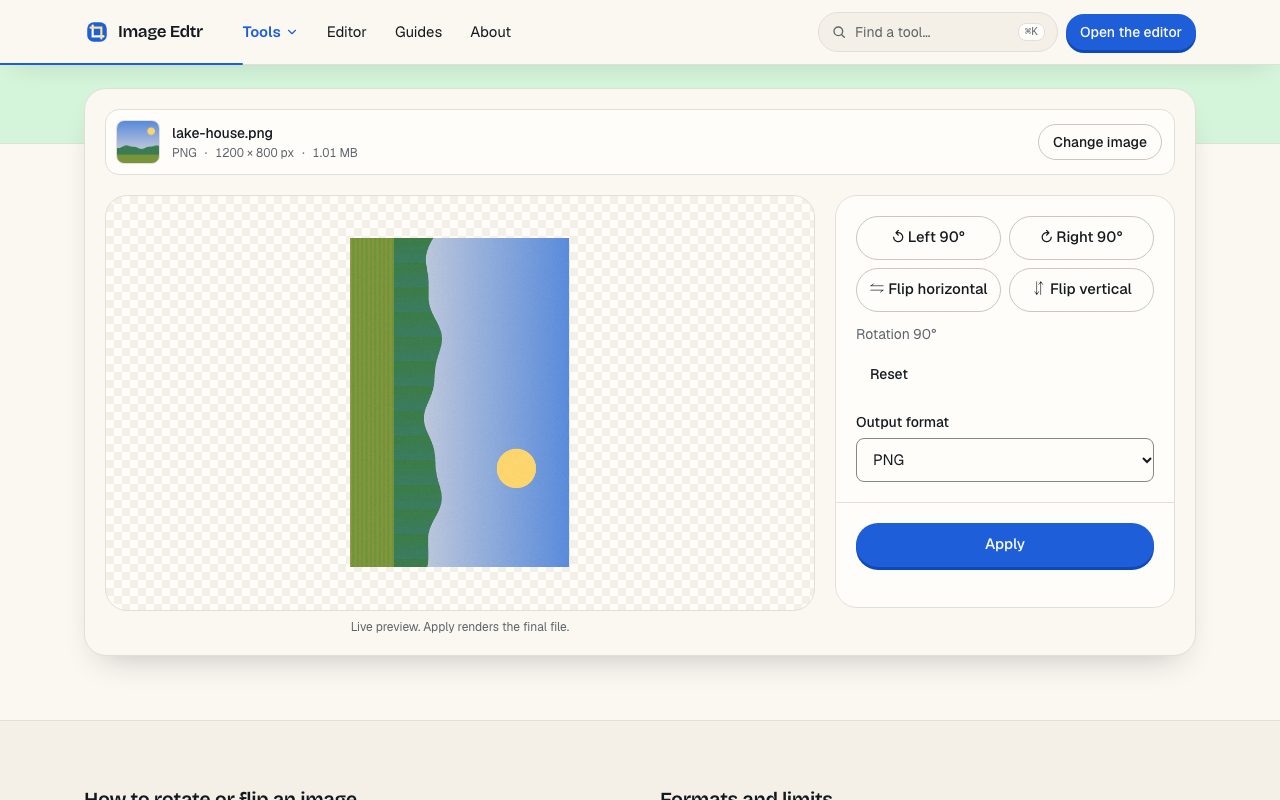
Select Left 90° or Right 90° as many times as you need. The live preview turns with each step, and a status line shows the total, such as “Rotation 270°”.
Flip if the image is mirrored
Select Flip horizontal to mirror left and right, or Flip vertical to mirror top and bottom. Select Reset to start over.
Pick the output format
Choose JPEG, PNG, or WebP where your browser supports it. For JPEG and WebP, set the quality.
Apply and download
Select Apply to render the final file, compare it with the original, then download it.
How do I rotate a photo 90 degrees?
Select Right 90° once for a clockwise quarter turn, or Left 90° once for counterclockwise. If the top of the subject currently points left, turn right; if it points right, turn left. For an upside-down photo, press either button twice. The width and height swap after a 90° or 270° rotation, which is expected.
The tool rotates only in 90° steps. It doesn’t straighten a slightly tilted horizon by a few degrees, and neither does the photo editor yet. For a tilted shot, a tighter crop that removes the slanted edges can sometimes help; the cropping guide covers composition.
When to flip an image horizontally
Mirroring is useful far more often than rotating by accident. A few cases where you’ll want to flip an image horizontally:
- Mirrored selfies. Some front cameras save the mirror view you saw on screen, so text on clothing or signs reads backwards. A horizontal flip makes it read correctly.
- Layout direction. If a person or product faces off the edge of a page, flipping it to face into the content often reads better. Check first that there is no text, logo, or asymmetric detail that would give the flip away.
- Scans and transfers. Images scanned from the back of film or prepared for iron-on transfers sometimes need mirroring.
Does rotating an image reduce quality?
Rotating by 90° steps or flipping moves pixels to new positions without blending or resampling them, so the pixel data itself is unchanged. The quality question comes from saving. Image Edtr writes a new file, which means the image is re-encoded in the format you choose.
| Format | Effect of saving | Good for |
|---|---|---|
| PNG | Lossless; no new artifacts, but photos are usually much larger | Screenshots, graphics, images you’ll keep editing |
| JPEG | Lossy; a high quality setting keeps changes hard to see | Photos for sharing, email, and older apps |
| WebP | Lossy at the quality you set; often smaller than JPEG at similar quality | Photos for websites |
Some desktop utilities can rotate a JPEG without re-encoding it by rearranging its compressed blocks. Image Edtr doesn’t do that; it decodes and re-encodes. For a one-time fix this is rarely noticeable at a high quality setting, but avoid rotating and resaving the same JPEG many times. The image formats guide goes deeper on which format to choose.
Rotate first, then crop and resize
Orientation should be the first edit you make, because every later step depends on which edge is the top. A 90° rotation swaps width and height, so a crop drawn on a sideways photo describes the wrong area once the photo is turned upright. The photo editor reflects this: rotating clears any crop you’ve set, since the frame has changed shape. Flipping, by contrast, keeps the crop and mirrors it with the image, so the same content stays selected.
Resizing has the same dependency. If a layout needs images at most 1600 pixels wide, a sideways portrait photo would be resized by its long edge instead of its short one. A practical order for most photos:
- Rotate or flip until the image is upright and reads correctly.
- Crop to the aspect ratio you need, using the crop tool.
- Resize to the pixel dimensions your page or platform displays.
- Compress last, once, so you don’t stack quality losses from repeated saves.
If you plan several edits, export the intermediate files as PNG so each step stays lossless, and choose JPEG or WebP only for the final file.
Fixing sideways photos in bulk and in your workflow
If you regularly publish photos from phones to a website or a store, decide where orientation gets fixed and fix it once. The safest point is before upload: rotate the pixels upright and remove the tag so every later system sees the same thing. On a web page you control, leaving image-orientation at its default lets browsers show tagged photos correctly, but other consumers of the same files (feeds, apps, print services) may not.
The rotate tool handles one image at a time, and the batch tool doesn’t rotate or flip. It does resize, compress, and convert many files, and because every output is re-encoded from the decoded image, those files are written without the source orientation tag. The batch processing guide covers that workflow.
Frequently asked questions
Why does my photo look upright on my phone but sideways on my computer?
Your phone reads the EXIF orientation tag and rotates the photo when it displays it; the program on your computer doesn’t. The pixels were stored in the sensor’s layout with a note saying how to turn them. Saving a copy with the rotation applied to the pixels, and no tag, makes it display the same way everywhere.
What is EXIF orientation?
It’s a metadata tag, a number from 1 to 8, that tells software how to rotate or mirror the stored pixels to show the image upright. Cameras use it so they don’t have to rearrange pixels when you turn the device. Value 1 means no change; values 3, 6, and 8 are rotations; the rest include a mirror.
Why did my photo get rotated twice?
Something rotated the pixels but kept the original orientation tag. The next app then applied the tag again on top of the already-rotated pixels. The fix is to save a version whose pixels are upright and which has no orientation tag, which is what Image Edtr produces.
How do I unmirror a selfie?
Open it in the rotate and flip tool, select Flip horizontal, check that any text now reads correctly, then select Apply and download. A horizontal flip is its own undo, so flipping a mirrored selfie returns it to the true view of the scene. Flip vertical is rarely what you want for selfies.
Can I rotate an image by a custom angle, like 3 degrees?
Not currently. The rotate tool and the photo editor both rotate in 90° steps only, so they can turn an image left, right, or upside down but can’t straighten a slightly tilted horizon. Cropping away the most slanted edges can make a small tilt less noticeable.
Is flipping the same as rotating 180 degrees?
No. A 180° rotation turns the image upside down while keeping text readable from the other side; a single flip mirrors it, reversing text. Flipping both horizontally and vertically, though, gives exactly the same result as a 180° rotation, so for an upside-down photo you can use either method.
Does CSS image-orientation fix sideways photos on my website?
Browsers already apply EXIF orientation by default, because image-orientation defaults to from-image. If photos still appear sideways, the tag was probably stripped somewhere before the image reached the page, or the page sets image-orientation: none. Re-saving the file with upright pixels fixes it regardless of CSS.